It’s a Snow Day!

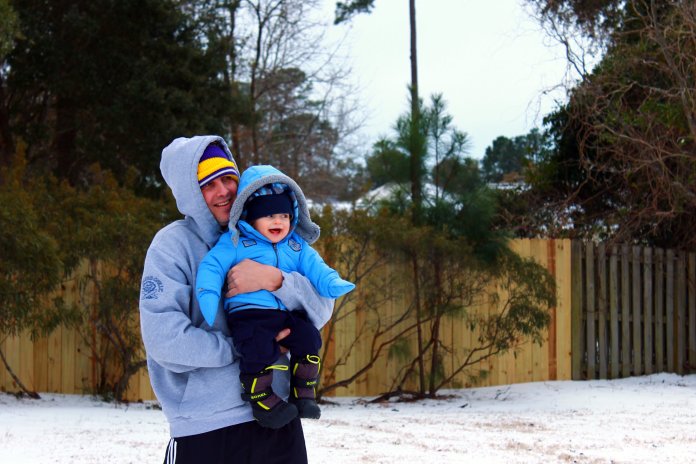
Okay, okay – so I know my Northern friends are laughing at us right now.  We got maybe an inch of snow (which is really ice!) and schools are closed, government offices didn’t open, both Darrin’s office and my office closed early yesterday and remained closed today.  We didn’t get hit nearly as bad as those in the deeper South (all of who we are praying for) but we did get just enough to spend a fun day playing in our version of a Winter Wonderland!

IMG_0588

Our backyard

L's first look at the snow!

L’s first look at the snow!

All bundled up

All bundled up

So excited!

So excited!

"What is this stuff, Mom?"

“What is this stuff, Mom?”

"This stuff is COLD!"

“This stuff is COLD!”

After our time playing outside we warmed up with some hot chocolate (for Mommy and Daddy) and caught up on an episode of Mickey Mouse Clubhouse – did I mention we’re headed to Walt Disney World in less than two weeks?  I haven’t?  Well, prepare to be inundated with our last minute planning for the next few posts!

Did it snow where you are?  How did you spend the day if it did?  What is your favorite cold weather activity?

Cloudy with a Side of BABY Meatballs!

A few nights ago I had an EPIC Pinterest dinner fail.  I was really excited for Lentil Stew in the crockpot and was really, really disappointed with how it turned out.  It was more like a soup, had ZERO flavor and the lentils were not cooked.  Needless to say Darrin and I made a quick call to a local pizza place.

Unfortunately pizza wouldn’t do for Lucas.  I’ve been giving him what we have at dinner but I’m not comfortable with pizza just yet.  In that moment I was so glad I had made a batch of meatballs and frozen them two weeks ago!  A quick cook in the microwave (typically I’d have thrown them in a skillet but I was in a major time crunch) and L had a delicious dinner that he couldn’t get enough of.  Since L loves these meatballs so much he practically BEGGED me to share them with you. Alright, alright – begged may be a bit strong, but he wanted all of his baby friends to taste some of the yummy goodness he’s been eating recently.

Baby Turkey Meatballs with Veggies


Ingredients:

IMG_0532

  • 1lb ground turkey (or chicken)
  • 1 carrot, grated
  • Handful of spinach, shredded
  • 1 egg (if you haven’t given your child egg yet you can substitute with a bit of milk or just leave the egg out totally)
  • 1/3 to 1/2 cup of Panko bread crumbs ( I just kinda of eyeballed it)
  • 2 dashes of Worcestershire (I use reduced sodium)
  • Spices to taste (I added garlic powder, onion powder and thyme – I also add a fair amount since I know L likes spices.  If you’re unsure try starting with 1/2 tsp of each)

Preheat the oven to 375 degrees.

Grate your carrots and shred your spinach.

IMG_0534

Combine all of the ingredients together in a bowl.

Roll the mixture into about 36 mini meatballs and place on a cookie sheet lined with tinfoil.

IMG_0535

Bake for about 11 minutes, or until the internal temperature is 170 degree.

IMG_0543

If freezing, allow to cool completely and then place back on a cookie sheet and freeze for several hours.  Store the meatballs in a freezer bag for up to two months.  When it’s time to sever just heat in a skillet over low heat until warm throughout.

Obviously we are big fans of this meal in our house.  I’m pretty sure L will be hoping for a few more Pinterest fails so he can nom-nom on some yummy mini meatballs again soon!

IMG_0549

Reverse Etched Glass Canisters

For the past few years we have done a Christmas gift exchange with both of D’s brothers and their wives.  We’ve always given some sort of date night (movies, coffee, etc.) and I was hoping to do something a little different this year.

We pulled D’s younger brother and wife this year who just moved their family from NC to Asheville and are in the process of buying a new home.  I thought doing something they could use in the new house would be a nice change of pace from past gifts.  After a night of playing on Pinterest from 3-5am (thanks L!) I found a pin for etched glass canisters.  I figured that would be the perfect housewarming/Christmas present.  They are very simple and clean (much like my SIL’s aesthetic), practical for a new home, and, most importantly, made with love!

The project was really simple and turned out really well so I thought I’d share it with all of you, just in case anyone else finds themselves in a gift rut!

Here were the supplies I bought:MommaAlwaysKnows Reverse Etching: DIY Glass Canisters

  • Set of 4 GLASS canisters
  • 1/2 self-stick letters
  • Masking tape (not sure how I didn’t have this on hand!)
  • ArmourEtch etching cream

And the other supplies I had on hand:

MommaAlwaysKnows Reverse Etching: DIY Glass Canisters

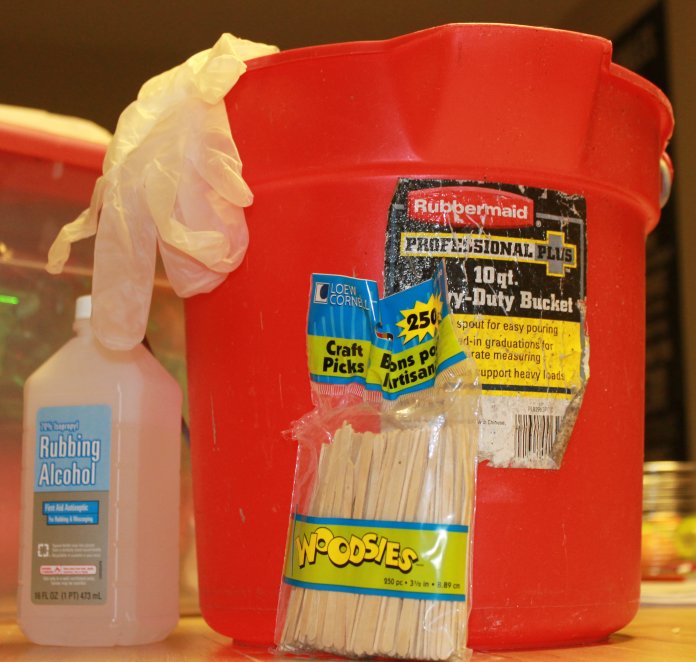
  • Rubbing alchol
  • Craft sticks
  • A big bucket
  • Gloves (the cream is caustic and you want to avoid any contact with your skin)

I started by cleaning the glass canisters with the rubbing alcohol and then wiping an excess liquid off.

Then I applied the stickers and the masking tape to create the area to apply the etching cream.  You can make the area as big or as small as you like and align the wording anywhere you please.  I like the wording closer to the top and a large area below etched.

MommaAlwaysKnows Reverse Etching: DIY Glass Canisters

After I verified the spelling about 10 times (I even asked D how to spell “tea”) I was ready to etch.  I read the directions on the bottle of etching cream I bought.  They said to only leave the product on for one minute but all the blogs I had read suggested at least 5 minutes.  The directions also said that rising the cream in a porcelain sink will damage it.  We don’t have stainless steel sinks so I decided to rinse into a bucket and then dump the water in the toilet.

I did a lot of Google research as well.  One tip that I found to be really helpful and wanted to make sure to pass along was instead of a brush, use a craft stick (or popsicle stick).  It allowed me to apply a really thick, even layer – this is key to making sure the etched area doesn’t have flaws.

So, applied a thick layer of etching cream and set the timer for 5 minutes.  Every 90 seconds I used the craft stick to swirl the cream around (this removes any air pockets and ensures the entire surface is well covered).

MommaAlwaysKnows Reverse Etching: DIY Glass Canisters

When my five minutes were up I rinsed the canister into the bucket (using a gloved hand to completely remove the cream).  I took the tape and stickers off and then rubbed a bit more alcohol over the area to make sure all of the sticky residue was removed.

I repeated those steps for the remaining canisters. And this was the end result!

MommaAlwaysKnows Reverse Etching: DIY Glass Canisters

A close up:

MommaAlwaysKnows Reverse Etching: DIY Glass Canisters

I decided to fill the coffee canister with some small bags of Starbucks coffee and a Starbucks gift card.  My sister-in-law loves coffee so I figured even if the canisters bombed she’d enjoy part of her gift!

MommaAlwaysKnows Reverse Etching: DIY Glass Canisters

This is a really simple, but impressive, gift idea or for a fun addition to your kitchen.

If you try this project, let me know how it turns out!

A Happy Birthday Art Project

My grandfather’s birthday is today.  He is turning 82.  I’m so happy that he, along with my grandma and uncle have spent the winter in Wilmington (not that convincing them to leave the cold of Western PA was that difficult.).  It has been so wonderful for Lucas to have his great-grandparents and uncle here for the past few months.

Lucas and Pap are pretty tight so he wanted to make him a special birthday card – I swear, he told me this himself and even found the pins on Pinterest for me!

Because the instructions I found didn’t work that great with a 10 month old, I thought I type up a quick lesson on how to make a Birthday Cake Handprint Card with an older infant.

Here are the supplies I used:

IMG_0521

  • Several colors of paint
  • White artist paper (I had 9×12)
  • A paint brush (or foam would work too). **In hindsight I would have had five clean paintbrushes instead of rinsing and drying the one I grabbed.
  • Baby wipes!

I put L in his high chair to make it a little easier (on me, not him).

I painted L’s palm one color (the cake) and each finger a different color (the candles).

This was my first attempt.

IMG_0522

In an effort to save you from the mistakes I made, let me break down the easiest way to get this done.

First, have a helper, especially if your little artist is too young to really know what’s going on.  I had to enlist D to help me.  It probably didn’t make it any easier that I chose L’s grumpiest day in the last three months for our art project, but having an extra set of hands was much needed.

Second, do each piece individually.  I painted L’s palm first and then (firmly) pressed in onto the paper.  I cleaned him up with a wipe and then moved on the first finger.  I did each finger individually as well.

Third, move the card (quickly if you have a sneaky little fox like I do) after each print is made. L wanted to grab and touch the paper and I really didn’t want him getting the wet paint all over him.  Our second attempt ended up that way.

Fourth, baby wipes and a magic eraser are you friend.  Okay, that one is probably a little obvious, but we certainly went through our fair share of wipes.  And the magic eraser has gotten paint off of our highchair more than once.

Here is what the card looked like after I had all of L’s hand on it.

IMG_0527

After it dried I used a yellow marker to add “flames” to the candles and finish off the card.

IMG_0529

Lucas gave it to Pappy at his birthday lunch yesterday.  He certainly seemed to like it!

And because of my “MommyFail” in forgetting to bring my camera to lunch I don’t have a picture of L and my grandpa from his birthday.  BUT, I do have this great shot I took at Christmas.  In fact, we framed this picture and gave it to Pappy for his birthday.

PapandLTree