
This post has been a long time coming! Before Christmas I started getting really frustrated with how messy our pantry was. And L’s art supplies. And the playroom. And our guest bedroom. But alas, I digress! The pantry was in need of some help. I tried to organize it a little before the holidays but made a promise to myself that after the new year I would do something about it.
I began to pin inspiration and then I started some Amazon Wishlists. After I priced out my Amazon Wishlist I realized my husband would probably file for divorce if I spent $450+ on reorganizing our small pantry. With that in mind I changed up my game plan but still ended up with a pantry I love. No, really, ask Darrin, I talk about how much I love that pantry All. The. Time!
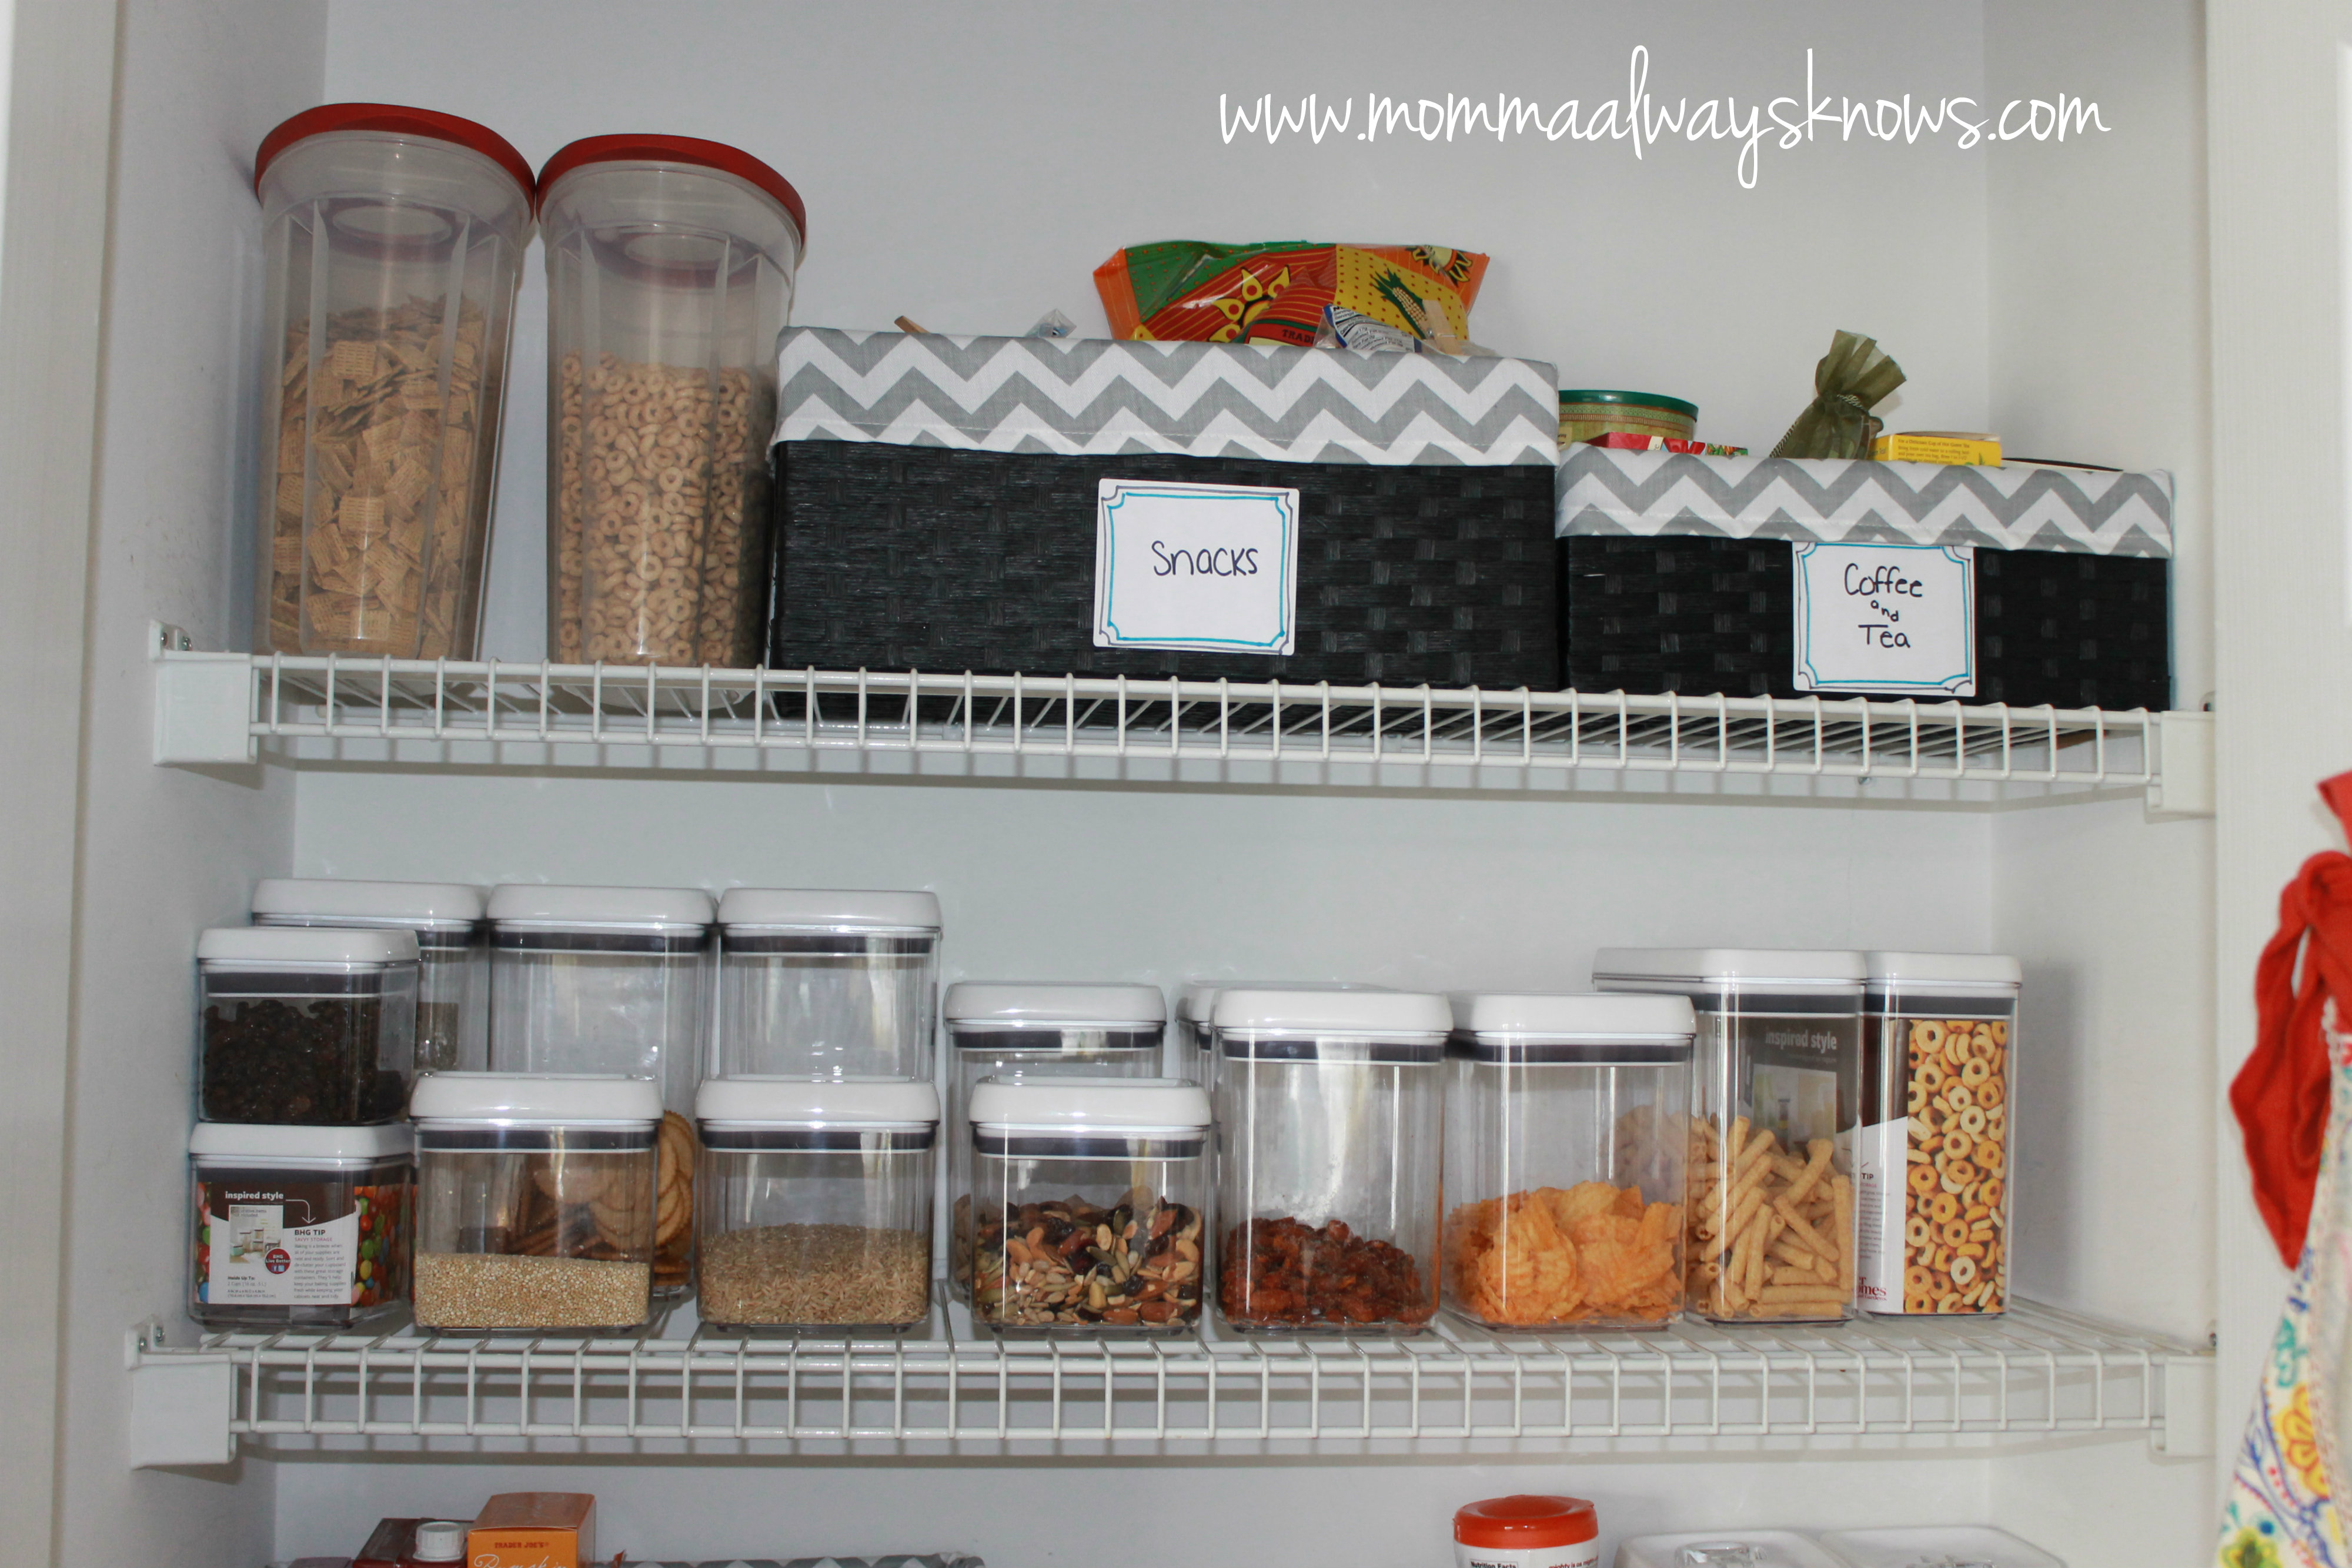
So first things first…what did our pantry look like before? This wasn’t as bad as it was before Christmas but it still makes me a little shaky just looking at the picture!
{BEFORE}

So not awful, but take a look at this beauty!
{AFTER}

And a view from the side:

Y’all I am totally in love! The whole project cost under $200 to complete. So yes, I get that may seem like a ridiculous amount of money to spend on a pantry but we had some Christmas money and Darrin said I could do what I wanted with it (he really is a gem!).
Now let’s break down what I did so you can recreate my masterpiece in your own house.
I was really, really coveting the OXO Good Grips Pop Containers but since they’re close to $20 each I decided I needed to rethink that aspect. I ended up going with Better Homes and Gardens Flip Tite storage containers that you can buy at Walmart. I purchased a few of the sets (4.5 cup, 7.5 cup and 10 cup containers) and then some individually (2 cup, 4.5 cup, 7.5 cup, 10 cup and 11.5 cup). I really, really like these containers. I wasn’t too sure of the quality at first but I asked some people who had used them and they had positive things to say. I’m so glad I went with these and saved some money. The 3 containers set was only $15!

Next I needed to get something to hold cereal and oatmeal. Darrin loves his cereal so I went with two 1.5 gal containers for cereal and another for the oatmeal. I really like the Rubbermaid Cereal Keepers I ended up choosing! **As a side note, I made sure I put the waffles/pancake mix recipe on the Flip Tite container and the oatmeal cooking instructions on the Rubbermaid container just so I knew I had them.
My baking supplies needed some organizing as well. I found these great containers at TJ Maxx for my flours and sugar. I ended up using more Flip Tite containers for the rest of my baking item.
Next up was finding some baskets to store items that I couldn’t put in storage containers. I ended up finding some really nice nesting baskets at Old Time Pottery for a great price! I also ended up needing more than I thought so I had to make multiple trips.

I also needed something to hold our tupperware-type containers. The baskets I bought just weren’t big enough so I made yet another trip to Old Time Pottery and found that awesome black and white bin you can see at the bottom left of the AFTER photo. It was perfect!
The last step was getting some labels for the baskets. I had a vision of what I wanted but I couldn’t find them anywhere. I ended up going with plain Avery Shipping Labels and making them a little fancier with markers!
Here are some more photos of the finished product:

After it was all said and done I realized I needed to do something about our plastic bags so I hung a 3M hook on the back of the folding door and they fit perfectly! Plus they are out of sight, which I love.
I also chose not to label most of my storage containers. This is because what’s in them changes often. I even keep an empty one or two in the closet to fill as needed. I didn’t want to have to peel labels off all the time when I went to wash the containers.
The basket containing my oils and vinegars also has honey and hot sauce and a few other things like that. It can get pretty messy so I made sure to line the basket with some aluminum foil to keep the mess contained and easy to clean up.
I thought about painting the inside of the pantry but didn’t want to have to deal with drying time. Then I thought about using contact paper to add a design to the walls but after a disastrous experience trying to cover our kitchen table with contact paper I decided to give up that pipe dream and just let it stay white! Maybe someday, when I do Pantry Organization 2.0 I’ll add some color!
So now our pantry is super organized and finding what I need is so easy. Plus I know when we’re running low on something and I need to get some more. And on top of that it’s so pretty to look at and makes me super happy! I did this several weeks ago and I STILL smile when I open the doors.


And there you have it, my organized and easy to use pantry! Life is just so much simpler when things are organized. And with a toddler, a husband and three dogs I need all the simple I can get!
