A Freezer Friendly Recipe: Ham and Hashbrown Casserole

Ham and Hashbrown Casserole

NOTE: I wrote this FOREVER ago – like a year I think! – and never published it.  We’re not eating much, if any, dairy now, but I still plan on sharing the plan I used during my pregnancy with Andrew since it was pretty awesome for us – and SO many of my friends are pregnant right now!

When I was pregnant with Andrew I made a ton of freezer meals to have after he was born (like 46!).  I have every intention of blogging that plan soon because I was crazy OCD organized about it and I want to share.

I found SOOOOOO many recipes that are freezer friendly as I was planning for that time.  Most were a huge hit, some weren’t!  Others have been added to our monthly rotation and will stay there forever!

I’m not a huge fan of ham typically, but Darrin is.  This seemed like a simple enough recipe and one that would freeze well.  After a few tweaks, it’s become a family favorite.  I’m already looking forward to making it with our leftover Christmas ham in a few months (less than 3 months to go actually!).

Cheesy Ham and Hashbrown Casserole

Ingredients:

  • 1lb cooked ham
  • 26 oz frozen hashbrowns
  • 2 cans of cream of potato soup
  • 8oz sour cream
  • 2 cups shredded cheddar cheese
  • 1 1/2 TBSP Dijon mustard
  • 1 tsp ground sage
  • 1/2 TBSP Thyme
  • 3/4 cup grated Parmesan cheese

Preheat oven to 375 degrees.

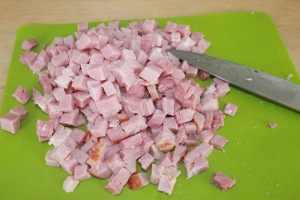
Chop up the ham.

img_4093

Combine all of the ingredients together, reserving 1/2 cup of the cheddar cheese for topping.

img_4094

Even spread into a prepared 9×13 dish.

(If freezing, here is where you’d wrap the dish up and put it in the freezer).

img_4096

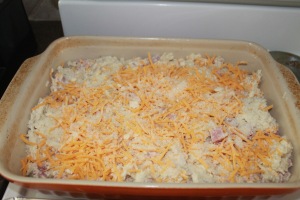
Top with the remaining cheese.

img_4097

Bake for 45 minutes to 1 hour until bubbly and browned on top.

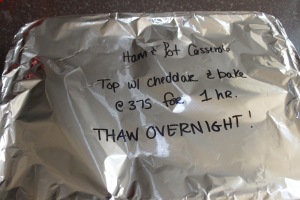
If making a freezer meal, when you’re ready to cook, remove from the freezer and thaw over night. Top with cheese. Bake for an hour at 375.  I like to write anything I need to add to the meal, plus the cooking instructions on tinfoil before wrapping so everything is right there on the meal!

img_4098

The mustard and spices give it a little something special and add a unique flavor, while keeping the prep super easy!

This is totally the season for freezer meals – kids back in school, evening and weekend activities are going full steam and there is nothing nicer at 5pm than knowing all you have to do is pop something in the oven and you’ll have a home-cooked meal in an hour!


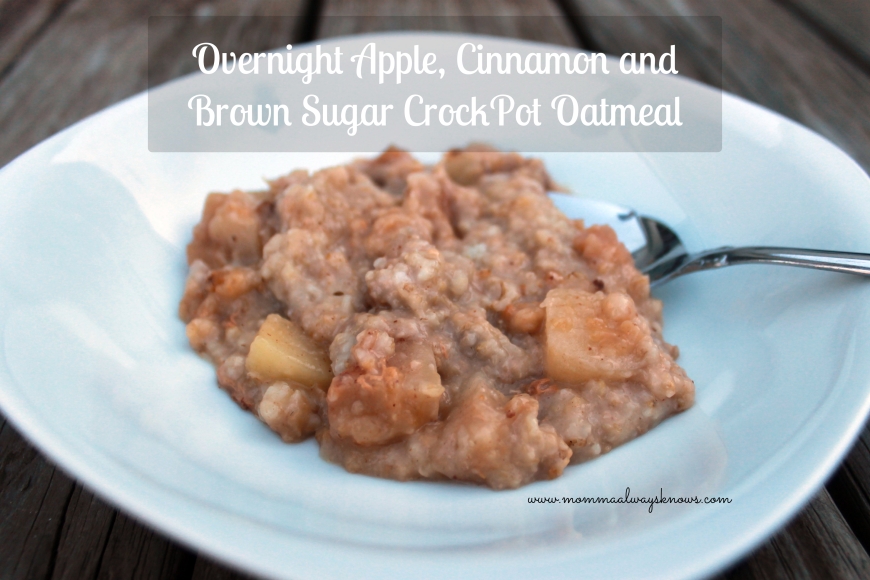
Overnight Apple, Cinnamon and Brown Sugar Oatmeal

Overnight Apple Cinnamon and Brown Sugar Oatmeal

Oh my gosh – Overnight Oatmeal in the Crockpot!  Why is this something I’ve only recently discovered?!  It’s super easy, totally convenient, requires no work from me in the morning, it’s healthy AND it’s delicious.

I’ve been experimenting with a bunch of different combinations and recipes and this is one I really, really like.  It’s sweet and creamy and very, very filling.  It’s perfect to enjoy on these cooler mornings now that the season change is coming.

Ingredients:

  • 2 TBSP butter
  • 4 apples (I love Honey Crisps) pealed and chopped
  • 1/2 c pack brown sugar (I use light)
  • 1 tsp cinnamon
  • Pinch of salt
  • 2 cups Old Fashioned Oats
  • 2 cups milk (I use 1%)
  • 2 cups water

Coat your crock pot with a bit of non-stick spray or a little extra butter to prevent sticking

Cut the butter into little pats and place on the bottom of the crock pot

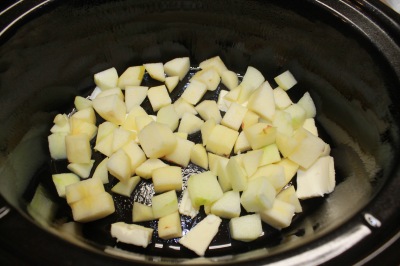
Add the apples on top

Overnight Apple Cinnamon Brown Sugar Oatmeal

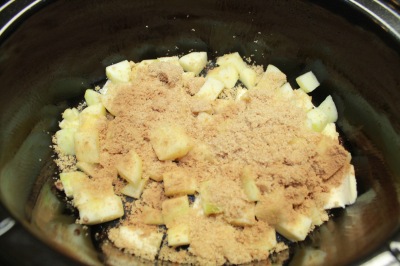
Next pour the brown sugar in,  sprinkle the cinnamon over top of the apples and add the pinch of salt

IMG_3242

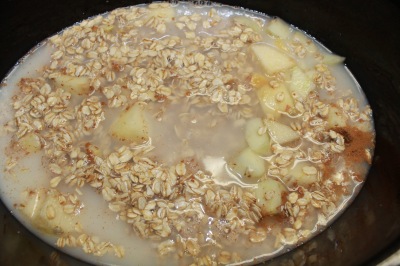
Add the oats next

Pour the milk and water over top of the oats

Overnight Apple Cinnamon Brown Sugar Oatmeal

DO NOT STIR…I repeat…DO NOT STIR!

Cover with a lid and cook on low for about 8 hours

Overnight Apple Cinnamon and Brown Sugar Oatmeal

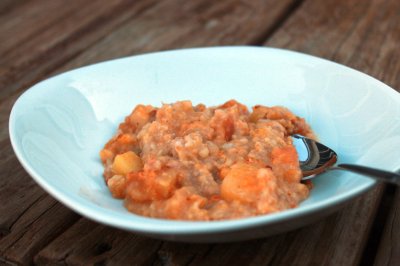
Wake up and ENJOY!  I serve ours with a drop of extra milk in the morning to make it extra creamy.

Overnight Apple Cinnamon and Brown Sugar Oatmeal

See, I told you it’s super easy and also so super delicious!

Are you a fan of overnight oatmeal?  What’s your favorite recipe?

Bacon, Spinach and Goat Cheese with Spaghetti Squash: The Perfect Meal to Bring in Fall

Bacon Spinach and Goat Cheese Spaghetti Squash

I love Fall!  No, really, it is, by far, my favorite season.  I love everything about it – the cozy clothes, the crisp air, the warm colors, the delicious smells and the food.

To be fair, we don’t really get fall until October here in Coastal North Carolina – we’ve got at least another month of 80 degree weather – but I’m all about starting early.  I mean, even Starbucks will have their Pumpkin Spice Lattes back at the beginning of September!

I made this dinner earlier this week and, besides being a HUGE hit with my husband, it screamed Fall Flavors to me!  This is one meal that will certainly be entering the rotation on a consistent basis.  And the best part, it’s gluten free and fairly healthy – I mean, as healthy as bacon can be!

Ingredients:

  • 2 medium to large spaghetti squashes
  • 1 package of bacon (mine was 12oz but I’ve seen some as big as 16oz – honestly, either will work)
  • 10oz of spinach
  • 2 Tbsp balsamic vinegar
  • 2 1/2 Tbsp maple syrup (use the good stuff)
  • 1 tsp dried thyme
  • 8oz of goat cheese
  • Salt and Pepper

Start by cooking your spaghetti squash.  There are several ways to do this.  I prefer to put each squash in the microwave for 3 minutes each.  After that I slice with a knife and place seed side down on a baking dish lined with foil.  I roast at 375 degrees for 30-40 minutes.  Once they are cooked I remove, flip over and let cool.

Chop your bacon into 1 to 2 inch pieces and cook over medium high heat until crispy and then lower the head slightly to render off the rest of the fat – about 4-5 minutes to crisp and another 5 or so to fully cook.

IMG_3193

Add the balsamic vinegar and scrape up any bits from the bottom of your pan.  The bacon grease will most likely splash up at this point, so be careful!

Stir in the maple syrup and the thyme and cook for about 45 seconds or so.

Begin adding your spinach in batches.  Cook until wilted and there is more room in your pan before adding more.

IMG_3194

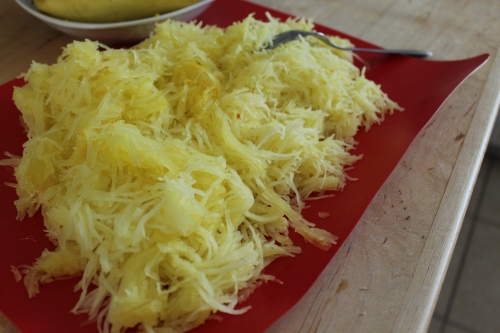
While I was doing that I was multi-tasking and scrapping my squash into “noodles” with a fork (remove the seeds and discard first).  I laid them out flat on a cutting board and salted at this point too.

IMG_3196

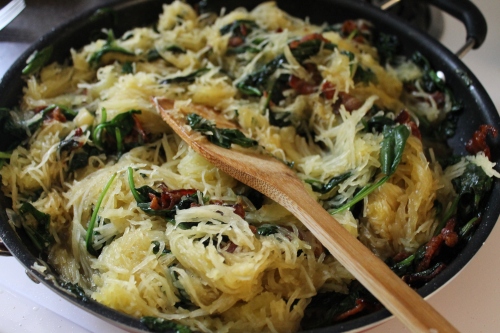
Once the spinach has all been added and wilted, add in your squash and stir.

IMG_3198

Lastly add in the goat cheese and stir to combine.

IMG_3200

Serve immediately and be prepared for the praise – this meal is delicious!

IMG_3205

**I got the original recipe from Buzzfeed and you can find it here.

Hello Fresh…Hello Amazing!

Hello Fresh Review

For those of you who have been following me for a while now you probably know that I love to cook!  If you didn’t know that, well, now you do.

I’ve shared some of my favorite recipes with you, including my Meatball Sub Casserole, my Spaghetti Squash, and my Buffalo Chicken Casserole.

About a month ago, however, a friend mentioned she had tried something new and I was intrigued.  She had tried HelloFresh, a meal box subscription service.  Now I love my subscriptions, we do Citrus Lane, Honest Co and Fabletics to name a few but I’d never thought to try one for meals.  She had a few “share these with a friend” codes so she passed one along to me.

We got our first box a few weeks ago and I LOVED it!  Honestly, I cannot say enough good things about it.  The veggies were super fresh and the proteins were of a really high quality.  The recipes were innovative and fun.  The delivery was awesome and everything tasted delicious.

So what is HelloFresh exactly?  Here’s how it works:

You sign up for an account and chose the meals for your box that week.  The Classic Box has 5 options and you select 3.

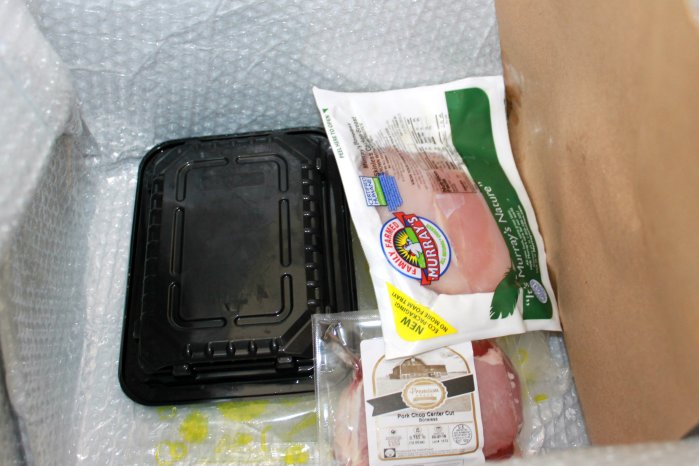
They deliver everything to your door.  The proteins were kept on dry ice packs and super cold when they arrived.

Hello Fresh Review

The produce and other ingredients were packaged by meal.

Hello Fresh Review

It also included recipes cards for each meal.

Hello Fresh Review

The meals I chose were:

Pan-Fried Shrimp Gyozas with Spring Edamame Succotash,

 {Ingredients}

Hello Fresh Review

{Finished Meal}

Hello Fresh Review

Dinner for me was 4 more Shrimp pockets and 7 more for Darrin. Plus about 6 left over!

Smoky Chicken Fajitas with Blistered Corn Salsa and Fresh Guacamole

{Ingredients}

Hello Fresh Review

I am the worst Fajita builder ever so there isn’t an “after” photo!

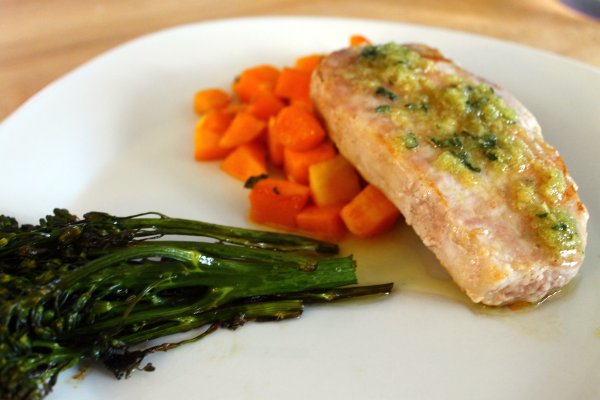
and Sage-Butter Pork Chops with Roasted Butternut Squash & Charred Broccolini

 {Ingredients}

Hello Fresh Review

{Finished Meal}

Hello Fresh Review

All three were just amazing!  We had plenty of leftovers for both Darrin and I for lunch with the Smoky Chicken Fajitas.  We would have had enough of the Shrimp Gyozas as well but Darrin isn’t a fan of leftover seafood so he stuffed himself at dinner and I had leftovers for lunch.  We didn’t have any leftovers of the Sage-Butter Pork, but were both very full after dinner!

So now the nitty-gritty…How much does this all cost?  The total cost for 2 people for a Classic Box is around $70.  That’s $70 for what could have been 3 dinners and 2 lunches each for 2 people.  In my house that’s a pretty good deal!  It’s a tad more than what we would spend for 3 meals (and leftovers) if I was just purchasing it at the store but I’m also getting simple and fun new meals to try and really fresh ingredients delivered right to my house!

If you’re still a little hesitant, like I was, I have a code that will get you $40 off of your first box!  That means for around $30 you’ll have at least 3 dinners for 2 people (and probably some lunches as well)!  Now $30 for 3 meals for 2 people (plus leftovers) is a super great deal in my book.  It’s totally risk free – you can cancel after the first box in just a minute or two.

So, what are you waiting for?  Try HelloFresh for yourself today!  I’m sure you’ll love it just as much as we do.